Add content with Markdown or MDX files
Add pages manually to your documentation by creating Markdown (.md) or MDX (.mdx) files and linking to them in docs.yml.
Custom components
Fern has a built-in component library you can use in Markdown and MDX files. Explore the components.
Frontmatter
You can optionally use frontmatter for individual page configuration.
Frontmatter must be added to the top of a .md or .mdx file, before the rest of the content. Use sets of three dashes to indicate the beginning and end of your frontmatter, as shown below.
title
Type: string
Default: The name of the page as specified in docs.yml
Set the content for the <title> element for a page. This title is displayed in browser tabs, history, and bookmarks, as well as in search engine results. Having a unique and informative title for each page benefits your site’s SEO (Search Engine Optimization). For more information, see Google’s guidelines for useful titles.
If no title is provided in the frontmatter of a page, the name of the page in docs.yml is used.
description
Type: string
Default: None
Set the meta description for a page. Like the page title, the meta description is important for SEO. It impacts the text that search engines display about your page in search results snippets. It can also influence search engine indexing and ranking. For more information, see Google’s guidelines for meta descriptions.
editThisPageUrl
Type: string (absolute URL)
Default: None
Provide the absolute link to the source .md or .mdx file in GitHub. Fern uses it to add an Edit this page link to the page, which users of your documentation can use to suggest corrections or additions.
image
Type: string (absolute URL)
Default: None
Configure the <meta property="og:image"> metadata for a page using an absolute path to an image hosted online. This provides an image to show next to a link to your documentation when the link is shared on social media, using a metadata protocol called OpenGraph. For more information, see the web.dev explanation of OpenGraph.
Links in Markdown
When clicked, links to relative URLs open in the same tab, whereas links to absolute URLs open in a new browser tab.
In Markdown, use a / to begin a relative URL instead of ./.
Configure your site with docs.yml
Every Fern Docs website has a special configuation file called docs.yml. Use this file to configure the navigation and styles for your documentation site.
Navigation
Sections, contents, and pages
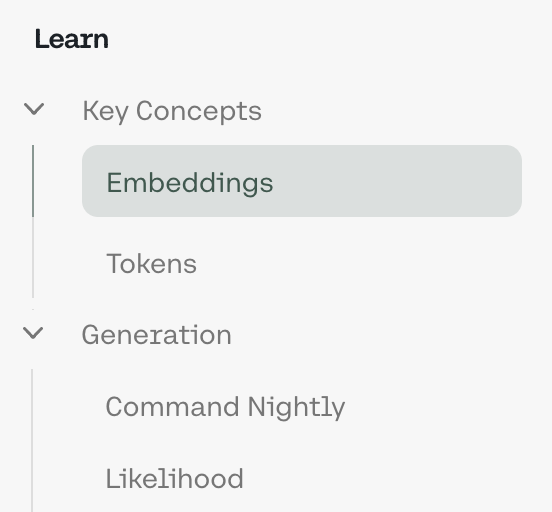
The navigation organizes your documentation in the left-side nav bar. You can create sections for grouping related content. Each section has a name and a list of contents. The sections appear in the left-side nav bar in the order that they are listed in docs.yml.
In contents, list your pages with names and corresponding file paths. The supported file types for pages are .md or .mdx.
A basic navigation configuration with two sections is shown below. The first section is called Introduction and contains a single page called My Page. The second section is called API Reference. This is a special type of section that’s automatically generated by Fern, and you do not need to add any pages to it by hand. You can read more about it in the API Reference section further below.
If you want to add another page to an existing section, create an .md or .mdx file. Then in docs.yml, create a new page in the contents list for that section, providing the path to the .md or .mdx file you created. Example:
To add another section, add another section to the navigation. Example:
Nested sections
If you’d like a section to toggle into more sections and pages, you can nest sections within sections. Here’s an example:
Navigation bar links
For links that you want to be easily accessible, you can specify a list of links in navbar-links. These links appear as buttons in the top right of your documentation website.
navbar-link type
Set the type to either primary or secondary. Primary links are designed to stand out and indicate that they are clickable with an arrow >. You can have one primary link.
navbar-link text
Set the link text that is displayed to the user.
navbar-link url
Set the target url for the link.
To use a relative URL, make sure that you use / to begin the URL instead of ./. This link opens in a new browser tab, regardless of whether it is a relative or absolute URL.
You can use a trackable link in your URL. For example, if using UTM parameters, instead of https://www.example.com/login, set the url to https://www.example.com/login?utm_source=docs&utm_medium=navbar.
API Reference
A key benefit of using Fern Docs is that you get your API Reference with just one line.
Add - api: API Reference and Fern takes care of the rest! You’ll see your endpoints, types,
and errors automatically populated from your OpenAPI specification.
Styles
Colors
Primary accent
You can specify a primary accent color using the hexadecimal color. The primary accent color is used for several purposes, including:
- to indicate the page a user is on within the navigation
- as the background of a primary link button
- to underline hyperlinks
- the next and previous page navigation buttons
Background
Just like accentPrimary, you can specify the background color using the hexadecimal color.
Logo
Add a logo that displays in the top left of your documentation website.
Logo path
path specifies the image file location. The supported file types are .png or .svg.
Logo height
height sets the logo’s height in pixels.
Logo href
href provides a link for the logo, often used
to point to the website’s homepage. When the logo is clicked, the user is directed to this link.
Favicon
Specifies the path to a favicon image, which is typically displayed in a
browser tab or bookmark. Supported file types are .png and .ico.
Advanced features
The following configuration options allow you to further personalize your documentation website using docs.yml.
Fonts
You can specify custom fonts for your documentation website. The supported file types are .woff and .woff2.
Include the custom fonts in your fern/ project:
Fern has three font types:
headingsFont: affects page and section titles; if not supplied, defaults to the body fontbodyFont: affects paragraph text and other body textcodeFont: affects code blocks and inline code snippets
To customize the font used for each font type, add a top-level typography list to docs.yml. Then in it, specify the path of your font file for one or more of the font types.
A font has two properties:
name: the name of the font; defaults to a generated name that will be used to reference your custom font in the eventually injected CSSpath: the path to the font file
If the font file is not variable, you can specify font weights.
A font path has three properties:
path: indicate that there are multiple font filesweight: a string of weights that are supported by this font filestyle: the style of the font file, eithernormaloritalic
Tabs
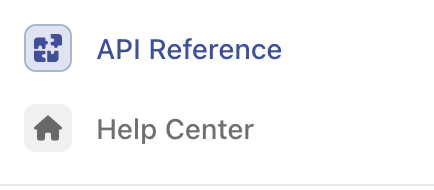
Within the navigation, you can add tabs. Tabs are used to group sections together. The example below shows tabs for Help Center and API Reference. Each tab has a title and icon. Browse the icons available from FontAwesome.
Here’s an example of what the Tabs implementation looks like:
Versions
If you have multiple versions of your documentation, you can introduce a dropdown version selector by specifying the versions.

When adding an entry to the versions list, specify the version’s display-name, which is visible to users, and path, which is a file that must be in a folder called versions/: